Showing posts with label Nails. Show all posts

07 August 2013

Manicure: August Grapevine

Hello all! I haven't posted my manicure in a while because I've been terribly lazy (as in, I've been giving myself quick french manis for the last 2 weeks or so) and haven't had anything on my nails worth posting.  The wait is over, though! I pained my nails a dark purple with some mint on the tips, hence the "grapevine" reference, haha.  Anyways, I hope you enjoy! 


Unfortunately, my pictures didn't do the colors justice (sometimes the lighting in my house goes super funky).  The dark purple was Revlon's "Bold Sangria," and the mint was Sally Hansen's "Mint Sorbet."  Both are absolutely beautiful alone but I decided I would combine them just to switch things up a bit.  Also, the mint brightens up the purple so the manicure doesn't look too winter-y.  Anyway, that's everything :)

Thanks so much for checking out this post! I'll have 2 Haul videos posted shortly, so keep your eyes open on my YouTube channel :) 

Love you all

<3

17 July 2013

Professional Pedicure

Hello all! So, I decided to post something that is seldom seen on this blog - a PROFESSIONAL nail job.  I haven't been to the nail salon since my friends and I got mani-pedis as a part of my Sweet Sixteen, so it's definitely been a while.  My mom, however, wanted to treat us all (my two sisters and I, as well as herself - that sneaky mom, haha) to a bit of mid-summer fun, so we all got pedicures at the salon.  The color I chose was China Glaze's "Pool Party," which is like a neon-watermelon color.  Here's what it looks like:

MINE AND MY SISTER'S PEDICURES

 MY OLDER SISTER

 ME

I usually paint my own toes, but I never post them because I don't particularly like feet (they're just ugly, alright? Not just mine - all feet).  BUT I DECIDED I would make a concession since this was special and I really enjoy this color.  Anyways, that's a wrap! 

Thanks so much for checking out this post!
See my YouTube channel for a brand new Summer Haul (lot's of goodies)
http://www.youtube.com/watch?v=N_gvFqDqNNo

Love you all

<3

21 June 2013

Manicure: Sea of Chevron

Hello everyone! THIS MAKES TWO NAIL POSTS IN A ROW - Gosh, I'm terrible.  But I REALLY love this manicure, so I decided I would show you :) Hope you like! And there will be outfits and reviews to come, now that it's summer (school got out yesterday)! YAY for this summer in SoCal.  Did you all know this is my last kid-summer? SO SAD.  Anyways, I'll get to the nail post ;)

BASIC INSTRUCTIONS and PRODUCT INFO:

1. After cutting, filing, buffing, etc... your nails, paint them with a basecoat 
(Nailtiques Formula 2 ... not shown in the above picture, because I couldn't find it :P)
2. Paint all nails (except for the ring fingers) with a nude shade and let dry.  This shade is only being used to provide a more attractive base, since the bottom halves of the nails will be showing.
(Wet N Wild Megalast in 203B "2% Milk")
3. Paint ring fingers with a teal / turquoise shade.  All other nail tips should be painted (like a chevron print) with this same shade.
(Sinful Colors Professional in 947 "Mint Apple")
4. Paint nail tips of ring fingers in the same chevron-like manner, only with a darker teal shade.
(Essie in "Trophy Wife")
5. Outline the chevron with white stripes on all fingers except the ring fingers.
(Kiss Nail Art in White)
6. For the ring fingers, outline the chevron between the two teal shades with silver glitter.  Then, on either side of the glitter, outline with a white stripe.
(Kiss Nail Art in Silver Glitter and Kiss Nail Art in White)
7. Allow all nails to dry and follow with a shiny top-coat.
(Sally Hansen Diamond Flash Top Coat)

Alright, everyone, so that's it! I decided I would put this mini-tutorial in because this is one of those manicures that's not really THAT self-explanatory, so I hope one of you will be brave / confident enough to try it out! If you do, let me know in the comments section below, I'd love to hear from you :) Thank you so much for checking out this post, by the way, you can complete the cycle by looking at my YouTube channel, Polyvore, and Pinterest (it's my personal account - I just added it to the "Pages" List on the RIGHT here).

Love you all

<3

12 June 2013

Manicure: Pink & Gold

Hey ladies! I've really been bulking up on the nail posts lately, I know, but they're really the only thing I have these days, since it's the end of the school year and my outfits have been FAR from perfect and therefore VERY FAR from bloggable :p Thank you for not giving up on me due to the limited selection, though! Come summer, there will be PLENTY more to look at, trust me - just let me get through finals, hehe.  Anyways, these are my nails for this week - not flat polish, but not too special of a design either. Hope you like, anyway! Product info will be posted (as always) at the end of this post, thanks for reading (in advance) and FOLLOW FOLLOW FOLLOW. :)


So, these are basically the same picture, except one of them is sharper, so I decided to post both just for good measure.  I was a little lazy on taking pictures of these, so their 3-day-old-ness makes them seem ... neglected.  I PROMISE, though, they looked much better before, just USE YOUR IMAGINATION ;)

Pink Polish: Sally Hansen's Total Salon Manicure in "I Pink I Can" (510)
Gold Polish: Essie's "Good As Gold" (I know, I use it a lot, haha)
Base Coat: Nailtiques Formula 2
Top Coat: Sally Hansen's Diamond Strength Top Coat

Thanks so much for checking out this post :) Visit my YouTube Channel (well, actually, it hasn't been updated in a while, so you should probably wait until later to do that, haha) and my Polyvore - you can learn a lot about a person from their sense of style! AFTER THAT, FOLLOW THIS BLOG to make me a happier person :)

Love you all

<3

30 May 2013

Manicure: Criss-Cross

Hi all! I'm back to normal (non-prom) posts, so this is just this week's manicure.  I've been really into natural colors (light pinks and french manicures) lately, so this is just a product of my latest obsession.  I decided to add the stripes for a bit of visual interest, and they totally paid off, because this manicure would have been boring as heck without them (haha).  It's SUPER EASY, I probably could have continued and did the design on ALL of my nails (had I had the motivation, haha) but I decided it would look classier with just the first two.  I hope you like! Products will be listed at the end of this post :) 


Base Coat: Nailtiques Formula 2
Pink Polish: "Petal Pusher" by Sally Hansen (I've been using that a lot lately, I know)
Black Criss-Cross: Nail Art by Kiss (Black)
White Criss-Cross: Nail Art by Kiss (White)
Top Coat: Diamond Strength Top Coat by Sally Hansen

Basically, all of the polish can be purchased at a drugstore or department store (I've seen Kiss products at Target, so you should check there first before going to a beauty supply - I think they're cheaper!) except for the Nailtiques Formula 2, which I purchased at Ulta a while back.  It's expensive for such a tiny bottle but it's completely worth it - it's been gradually (but not slowly) strengthening my natural nail and replenishing the healthy color to them (the whites of my nails used to be stained an off-white / light yellow because of NAIL POLISH).  Also, the top layer of my nail (near the tips) doesn't peel anymore, and my nails grow faster and longer these days.  Anyway, I really love this base coat, and I totally recommend!

As always, thank you so much for reading :)
There's always more to come here (my YouTube channel, on the other hand, needs some serious updating - I promise I'll start filming again when school gets out! Haha)

Love you all

<3

26 May 2013

Manicure: PROM EDITION!!!

Hello darlings! So, last Saturday was PROM (enough said, right? haha).  We all know that the slow dance and all of those iconic "prom" elements are important, but really, it's all in the details, the dress, and the GETTING READY WITH YOUR FRIENDS that makes the whole adventure TRULY fun.  Out of respect for my date's privacy, I WON'T post a picture of the two of us, but I'll post what I can so that you can get a feel for what the night was like.  The main event of this post is actually my NAILS, which my friends were dazzled with ("Did you do these yourself?" "Yes" "Open up a freaking nail salon, will you?") and I loved very much.  They're a bit shabby in the pictures since I let them grow out for a few days but you get the point, I'm sure.  Please comment and/or follow my blog if you like this!


 Here's just my thumb nail - it was my favorite design out of all of them :)


So, basically what I did was I first painted my nails with one, thin coat of "Petal Pusher" by Sally Hansen in order to get a more desirable-looking base - kind of like doing a French Manicure. I then painted diagonally across all of my nails (to create that half-effect) with "My Vampire Is Buff" by OPI.  On my middle finger, I painted the entire nail for some variety.  I decided to do a buff color instead of white in order to soften the look of the entire manicure.  After this, I dotted spaces of my nail with "Eternal Optimism" by Essie (dark pink), "Sea" by Sally Hansen (mint green), and "Petal Pusher" by Sally Hansen (lighter pink).  I only dotted these colors on the part of my nail that was painted with "My Vampire Is Buff," and left the natural half of my nail just the way it was.  I outlined the spaces with silver glitter nail-art polish by Kiss.  I then finished with my Diamond Strength top-coat :)  The only thing I have to say is that you have to be a bit more skilled with your left hand (my weak hand...if you are left-handed, then I'm talking about your right hand) to pull this off.  It's not a "hard" manicure to complete, though, so don't let the detail discourage you! If you try it out, let me know in the comments section below :)

I hope you all like!  Thanks for checking out this post :)
_________________________________________________________________________________

I said I would post what I could, so....

Corsage

My GORGEOUS best friend, Haley, and I :)

Haley's Dress: black strapless hi-lo with an open caged-back detail (so beautiful)
Foreign Exchange, $37.00
http://www.shopfe.net/eshop/product.phpproductid=31415&cat=1487&sort=orderby&sort_direction=0&page=5

My Dress: white off-shoulder cinched-waist dress with attached sleeves
Foreign Exchange: $29.00
http://www.shopfe.net/eshop/product.phpproductid=33551&cat=1487&sort=orderby&sort_direction=0&page=3

HOLLA FOR THE CHEAPEST, PRETTIEST PROM DRESSES OUT THERE ;)

All make-up was done (by me, haha) with Urban Decay's "Naked 2" Palette

Love you all

<3

05 April 2013

Manicure: Featuring "Green With Envy"

Hello everybody!  So, it's spring time and that means I am entering my pastel-phase (as always) when it comes to nail polish as well as clothing.  This is the second week in a row that I've used Maybelline's "Green With Envy" mint-green color on my ring-finger as a feature nail, and since I'm loving it so much I decided I would show all of you :) Please comment.


Ring Finger: 
Maybelline Color Show "Green With Envy" and Rimmel London's "French White Tip Pro"
Nails: Revlon ColorStay in "Coastal Surf"

AS A SIDE NOTE: Since last week's manicure was essentially the same (minus the white dots on the ring finger), I might as well tell you about it :)
LAST WEEK'S MANICURE:
Ring Finger: Maybelline New York Color Show "Green With Envy"
Nails: Revlon ColorStay in "Cafe Pink" (it's a pastel or baby-pink color - SO PRETTY)

ANOTHER SIDE NOTE:
Base Coat: Nailtiques Formula 2 Nail Protein
Top Coat: Sally Hansen Insta-Dri Anti-Chip Top Coat

ANYWAYS thank you so much for checking out this post :)
Why don't you take a look at my YouTube Channel?
www.youtube.com/MsFrizzled
(don't forget to rate, comment, and subscribe)

Love you all

<3

05 February 2013

Manicure!

Hey everyone!  So I just wanted to show you what I did with my nails this week (I am completely in love) so I hope you like!  Make sure you leave a comment and/or follow me :)

Alright so here's the first pic of my nails...On my pointer finger, middle finger, pinky, and thumb (not shown) I have Essie's "Dive Bar" - it's SO GORGEOUS.  It seems like blue at a first glance, but in the light it looks like a deep-sea green, and even has facets of purple.  I think this is honestly my NEW FAVORITE Essie polish, which is really saying something!

Here's the second pic...I already mentioned Essie's "Dive Bar," so I won't talk more about that - I'll talk about what's on my ring finger.  I used a base of Essie's "Good As Gold," which I've used multiple times before (I'm pretty sure I've posted a manicure using this color as well) and absolutely LOVE.  As I said, though, I only used it as a base color to make sure that my nail was completely covered.  The glittery polish that you see is Essie's "Beyond Cozy" which is also a LOVELY color.  I'm starting to think I didn't even need to use the gold as a base because this glitter polish offered a nice coat, not like some other glitter polishes that cover the nail sparsely with glitter and mostly with clear goop.  

I've gotten 6 compliments on my nails already, and today was only our first day back from Semester Break (I even got a few compliments from GUYS - what the heck? I know).  Anyway, I hope you all liked this post, and maybe you'll try this some day!  I must say its a lovely pairing because of the heavy contrast.  Like I said earlier - I'm in love!

Thank you so much for checking out my blog!

Complete the cycle by watching my latest video on YouTube:
Shaving | Tips & Tricks: http://www.youtube.com/watch?v=4KkLcI703rU
Make sure you rate, comment, and subscribe! Thanks again :)

Love you all

<3

27 December 2012

Get Ready With Me! Christmas Eve Mass

Hello lovely people!  So I was kind of debating posting this, because I know that religion is kind of a touchy subject for some people, and maybe it would be offensive in some way to post what I wore to church on Christmas Eve.  Anyway, my religion is important to me, so I'm posting this (this is not really about religion anyway, it's about an outfit, but yeah I just wanted to put in this baby disclaimer here haha).  SO here's a few pics to outline what I wore and what my face looked like, I hope you enjoy ;)

You can check out my YouTube video on this (it's way better than just looking at these pictures)
http://www.youtube.com/watch?v=yyJRnoHAwnY


PRODUCTS I USED IN MY VIDEO:
(I promised that I would post them here)

CLOTHING:
Black Dress: PacSun
Stone Necklace: Brandy Melville
Chunky Knit Cardi: Foreign Exchange
Tights: I HAVE NO IDEA
Black Bandeau: Heavenly Couture
Black Pointed Flats: H&M

MAKE-UP
FACE:
Maybelline Dream Fresh BB Cream in Medium
E.L.F. Tinted Moisturizer in Beige
Maybelline Coverstick (Medium Skin Tone Concealer)
Maybelline Coverstick (Green Tint Blemish Concealer)
Physician's Formula Light Bronzer (and E.L.F. Kabuki Brush)

BROWS:
Wet n Wild Color Icon Eye Pencil in Mink Brown
Smudger Tool
Maybelline Great Lash Clear Mascara

EYES:
Stila Eyeshadow
Covergirl Perfect Blend Eyeliner in Basic Black
E.L.F. Cream Eyeliner in Black
NYX Jumbo Eye Pencil in Iced Mocha
NYX Eyeshadow Base (Natural)
Eyelash Curler
L'Oreal Voluminous Carbon Black Mascara (Waterproof)

LIPS:
EOS Lip Balm in Lemon Drop
Covergirl Lipstick in Rose
Mentha Organics Lip Gloss (from Bath&Body Works)

AND YEAH I THINK THAT'S IT
I hope you guys liked my video (if you watched it) and/or this blogpost!

Thanks for being here!
Love you all

<3

23 December 2012

Christmas Nails +

Hey everyone!  So Christmas is coming up, my favorite time of the year!  In years past, I've done a lot of crazy things on my nails during Christmas time (a french manicure with christmas lights on the tips, red with Christmas trees and snowmen, etc) but this year I decided to do something more subtle, but still really Christmas-y and interesting.  So keep reading if you want to see my Christmas nails!

Here's the finished product!


 Alright so from the top:
Red Nail Polish: I got this in a gift set from my Godmother about 2 years ago, so I don't think there's a brand or anything attached to it.  You could use any red nail polish for this look, though, so it doesn't really matter.

Champagne/Copper Nail Polish:  Essie's "Buy Me a Cameo," which I recently received as a Secret Santa present (see my last post!).  This color is really beautiful, I love how shimmery it is and how subtle the color is, especially on my skin tone.

Top Coat: Sally Hansen Insta-Dri Anti-Chip Top Coat.  This stuff says that it dries in 30 seconds, and let me tell you, it dries in 30 seconds.  Just make sure you don't press on you nail and try to scratch at them or something just to test it out, haha!

NOTE: always use a base coat - I find that base coats are all the same, you could even use a nail serum or hardener, as long as you don't put the color directly onto your nail, you'll be fine!

NOTE: when I paint my nails, I have a trick to make sure my nail polish is dry.  I put on the top coat (which dries in 30 seconds) and wait about a minute and a half, then I go over to the sink and turn on the COLD water.  IF YOU DON'T HAVE A FAST DRYING TOP COAT, YOU'LL NEED TO WAIT A LITTLE LONGER.  I run the cold water over my nails by putting the back of my hand under the faucet and pointing my fingers toward the ground.  This way, the water starts off gentle.  Then, if you feel like your nails can take it (be confident! nail polish is more durable than you may think!) start washing your hands with soap.  Don't be gentle about it, either, just wash you hands like you would normally.  The water should have hardened your polish before you started washing with soap, and after you wash the nail polish smell will be GREATLY reduced, which is always a plus.  Anyway, that's my trick!

 Here is Essie's "Buy Me a Cameo" all by itself.  I wanted to show you guys that it's subtle but shimmery, and that it doesn't really look like a copper color, like it does in the bottle.

Here's another picture of the final product, with the red stripes and the shimmery base.  I think this still looks Christmas-y, as I said earlier, but it's not over-the-top crazy.  It's definitely classy, so anyone could wear this look :)  Anways, I hope you enjoyed, maybe got an idea for your own nails!  This will also be on Instagram, in case you wanted to know :)

Make sure you check out my YouTube Channel, I'll be putting up a few new videos really soon!
Love you all

<3

10 August 2012

Nails: A Classy Mani For You ;)

Hi everybody :) So this is just what I have on my nails right now (it looks complicated, but I PROMISE it's super easy to do - let me know if you try this out!).  I think the thing I like the most about this manicure is that it's subtle and flashy all at the same time.  I hope you like it too :) Please comment.


Essie Nail Polish:
It's honestly one of my favorite brands, it's a shame that they have to be $8 a piece!  Essie polish, in my opinion, goes on so smooth (even smoother than OPI) and the colors are saturated - you dont need multiple coats to get the job done.

Essie's "Eternal Optimist"
It's like a rosy-mauve color, and it really is beautiful on any skin tone :)

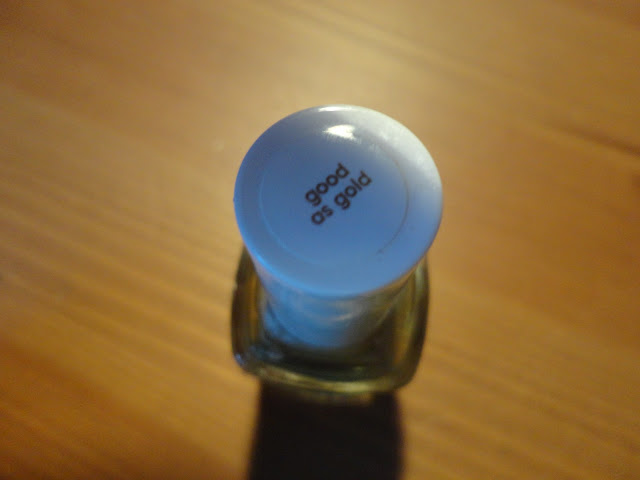
Essie's "Good as Gold"
This polish is absolutely BEAUTIFUL - it's very metallic, so if you don't like a bunch of shine on your nails this is probably not going to be your choice of nail polish, but the quality is amazing (like I said about ALL Essie polish) and the color is very, very pretty (and it catches people's attention, too! I got a ton of complements from girls AND guys)

Here's a final pic for you guys :)

Thanks so much for checking out this post!  Complete the cycle and check out the video tutorial for this manicure on my YouTube Channel !